
An oil-free air compressor delivers compressed air without oil injection into the compression chamber. That design protects sensitive downstream processes, but it also means the machine depends on clean filters, correct cooling, and disciplined servicing to stay reliable. A structured oil-free air compressor maintenance checklist turns scattered chores into a repeatable routine, so nothing important slips between shifts.
This guide gives plant engineers, maintenance managers, and equipment operators a practical task list organized by daily, weekly, monthly, quarterly, and annual intervals. It also explains why each task matters, what to record, and how to plan professional service work. The goal is simple: stable air purity, predictable uptime, and a clear maintenance history you can show to auditors or customers.
All tasks described here apply to common oil-free rotary screw and scroll designs. Always confirm interval details and torque values against the manual supplied with your specific unit before starting work.
Why an Oil-Free Air Compressor Needs a Structured Maintenance Checklist
Oil-free compression removes the risk of oil carryover at the source, yet the machine still faces heat, dust, moisture, and mechanical wear. Seals age, filters load up with particulate, and condensate accumulates in the air receiver and piping. Without a checklist, small deviations compound quietly until they appear as pressure swings, rising energy use, or unplanned stops.
A written checklist creates three concrete benefits. First, it standardizes work across operators and shifts, so a task done on Monday looks the same when a different person repeats it on Friday. Second, it builds a service history: every logged reading becomes evidence when you troubleshoot a trend or plan spare parts. Third, it supports compliance, because food, pharmaceutical, electronics, and medical applications routinely ask for documented air system upkeep.
Treat the checklist below as a baseline. Adjust frequencies to match your duty cycle, ambient dust level, and the compressor manufacturer’s recommendations.
How to Use This Checklist
Work from the shortest interval to the longest. Daily items take minutes and mostly involve observation. Weekly items add light cleaning and verification. Monthly and quarterly tasks demand tools, spare parts, or short shutdown windows. Annual work usually requires a service technician with factory training.
Record every result in a maintenance log, even when the reading is normal. A log full of “OK” entries still proves the routine ran. Note the date, operating hours, readings, parts replaced, and the technician’s name. If your facility runs multiple machines, keep a separate log per unit and label each entry with the machine serial number.
Before any task, isolate and lock out energy sources according to your site procedure, release stored pressure, and allow hot surfaces to cool. These three steps appear simple, yet most compressed-air maintenance injuries trace back to a skipped lockout or an assumed-empty line, so treat them as non-negotiable every single time.
The Components Your Checklist Covers
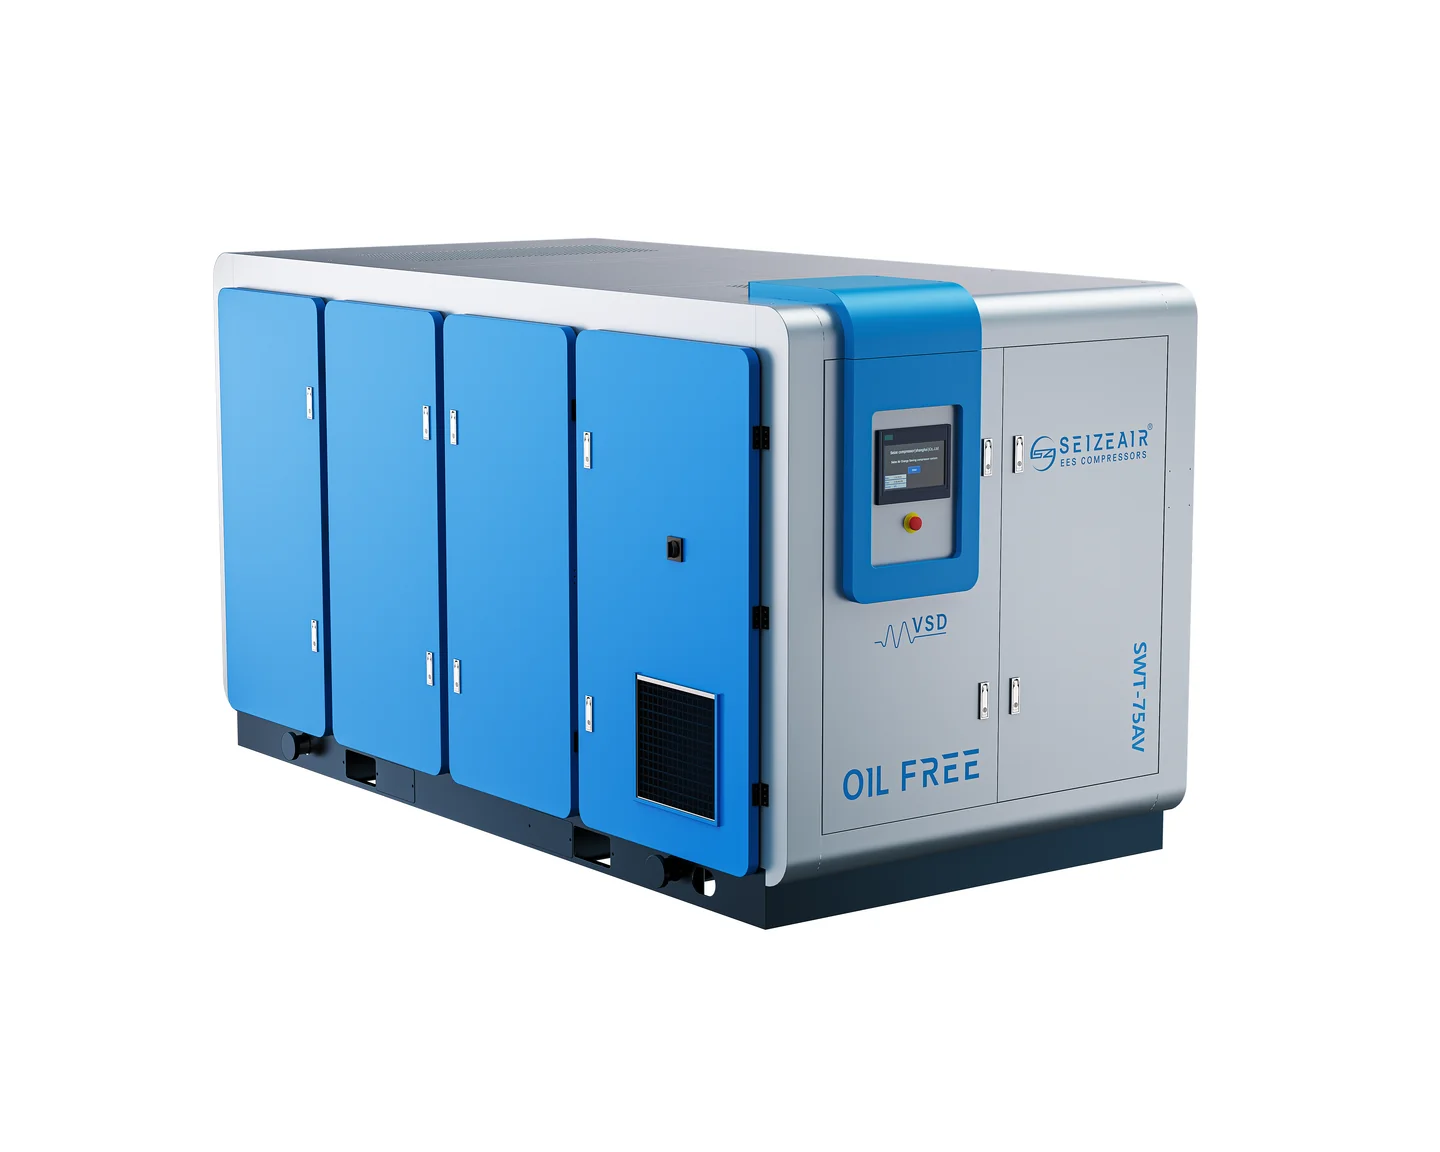
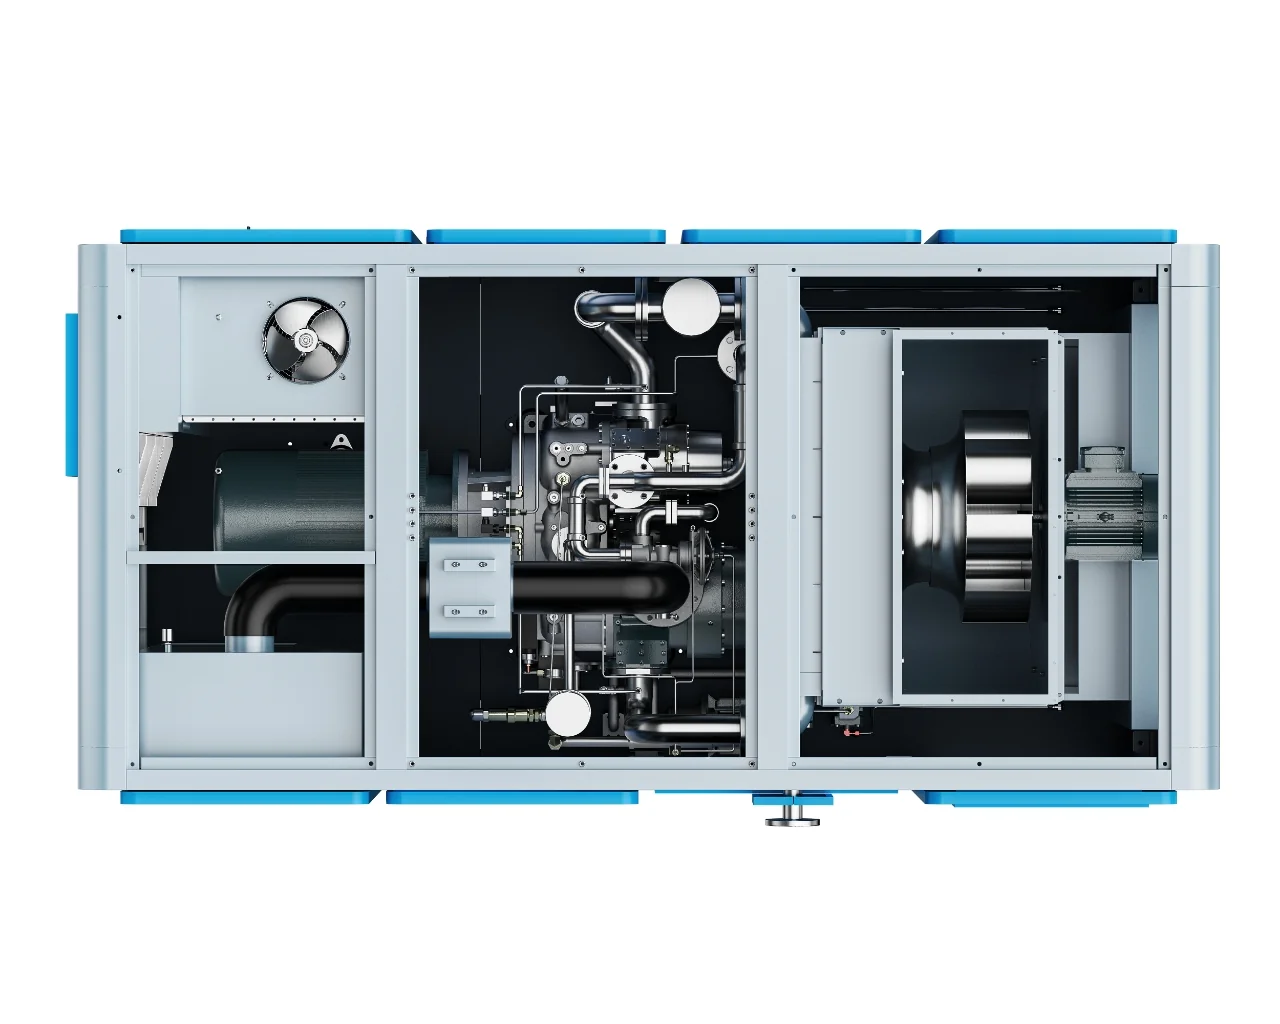
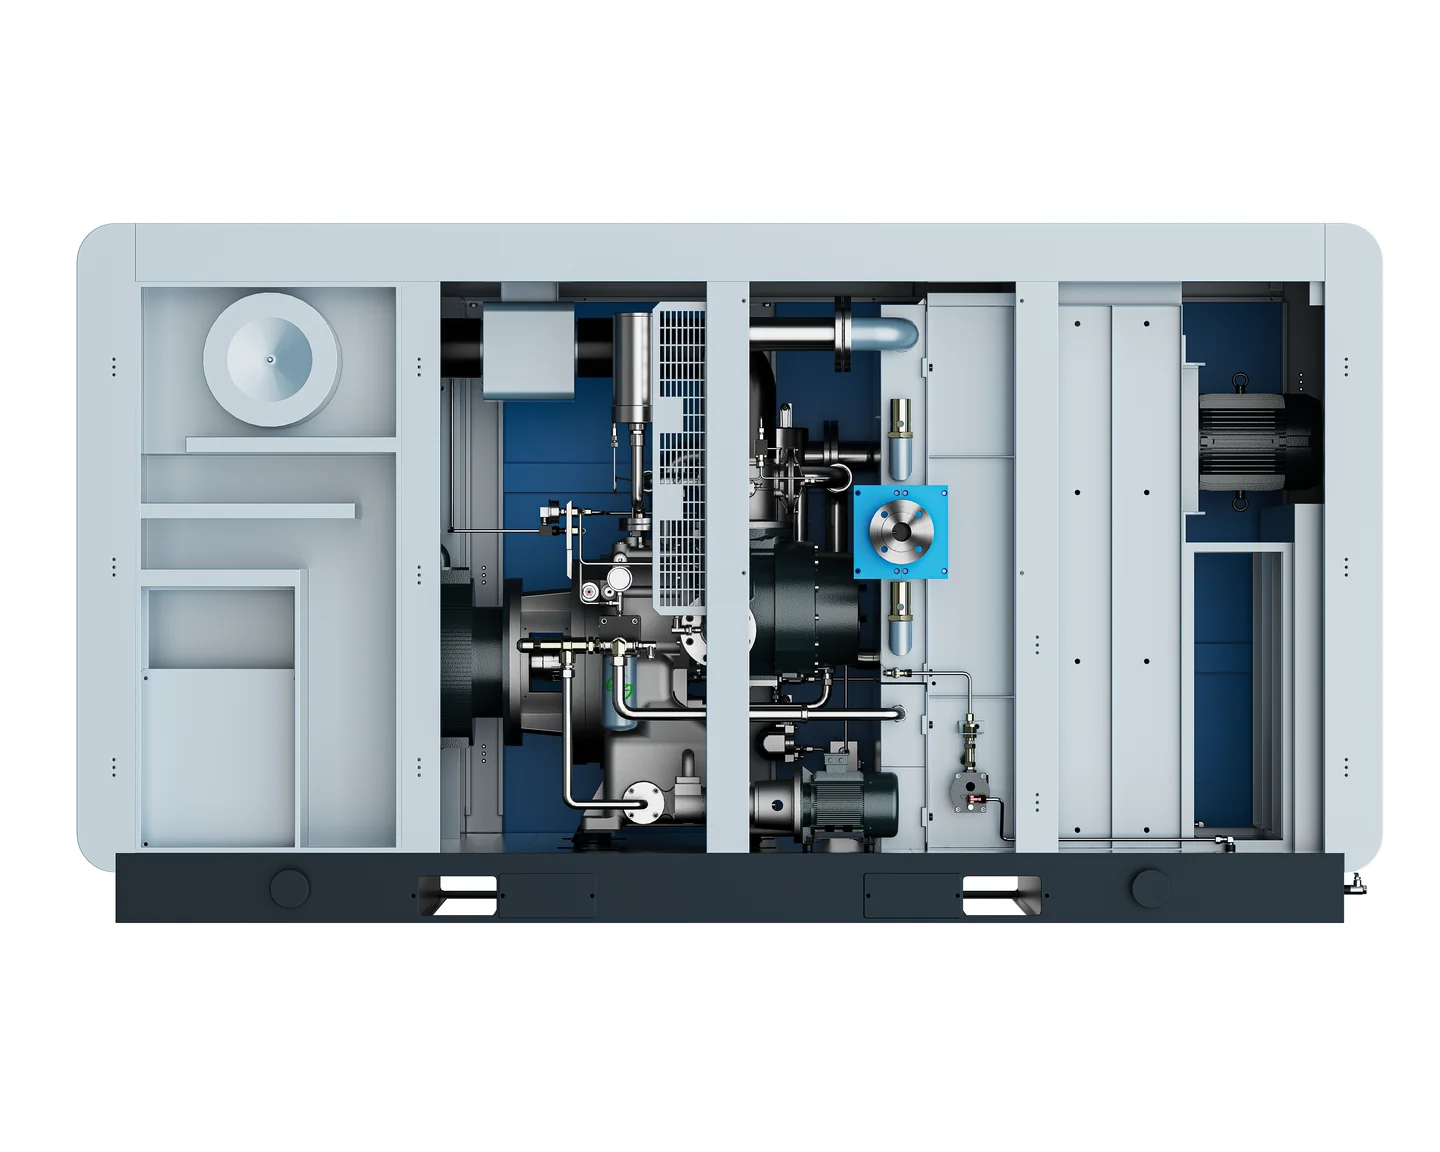
Before working through the intervals, it helps to know which parts of the machine consume maintenance attention. An oil-free rotary screw compressor, and to a lesser extent an oil-free scroll unit, shares a common set of subsystems. Each one maps to specific tasks in the checklist.
- Airend (compression element). The paired rotors or scroll wraps that compress air without oil contact. Airends are durable but intolerant of overheating, dust ingestion, and lubricant starvation in their bearings. You rarely open an airend on site; instead you protect it indirectly through filters, cooling, and vibration monitoring.
- Intake filter and silencer. The first line of defense against dust. A clogged intake filter raises vacuum at the inlet, reduces delivered flow, and forces the drive motor to work harder for the same output.
- Intercooler and aftercooler. Heat exchangers that remove compression heat between stages and before delivery. Fouled fins quietly raise discharge temperature and shorten seal life.
- Air receiver and drain traps. The storage vessel and its automatic drains. Standing condensate corrodes the receiver from inside and can be carried into process air when flow surges.
- Final filters and drying equipment. Located downstream of the compressor, these define the delivered air class. Their change intervals depend on site air quality as much as on hours run.
- Drive system. Motor, coupling or belts, and on variable-speed units the inverter. Drive faults usually announce themselves through noise, heat, or current draw before they trip the unit.
- Controller and sensors. The brain of the machine. Pressure and temperature sensors drift over time, so calibration belongs on the quarterly list.
Knowing this map turns a vague “check the compressor” instruction into specific, assignable tasks, which is exactly what a checklist is for.
Daily Maintenance Tasks
Daily checks are mostly visual and take only a few minutes while the machine runs or during a planned walk-around.
- Check operating pressure and temperature. Compare the controller display with your process requirements. Unexplained drift can signal a blocked filter, a leak, or a cooling problem.
- Inspect for unusual noise or vibration. Rattling, scraping, or a new tonal whine often appears before a mechanical failure.
- Look for leaks. Walk the machine and near piping while listening for hissing. Mark suspect joints for repair during the next stoppage.
- Drain condensate. Empty receiver and line drains; verify automatic drain traps cycle correctly.
- Check indicator lamps and alarms. Resolve warning messages before they escalate to trips.
- Verify cooling airflow. Confirm cabinet vents and room exhaust fans are unobstructed.
Record readings in the log. If a value drifts two days in a row, open a work order instead of waiting for the weekly check.
Weekly Maintenance Tasks
Weekly work adds light cleaning and verification steps that keep the machine within its design environment.
- Clean intake filters and cabinet vents. Dust on the air filter raises the vacuum at the inlet and reduces delivered airflow.
- Wipe down the machine and controller. Remove dust that holds heat against electrical components.
- Inspect drive belts or coupling guards. Look for cracking, glazing, or looseness on belt-driven units.
- Test safety valves and emergency stops. Confirm each protective device actuates and resets properly.
- Review running hours. Compare with the service schedule so parts can be ordered before they are due.
Weekly checks also cover the compressor room itself. Keep the area free of stored items that block airflow, and confirm room temperature stays within the range stated by the manufacturer.
Monthly Maintenance Tasks
Monthly tasks typically require a short planned stop and basic hand tools.
- Replace or inspect intake filter cartridges. Swap on schedule even if the filter looks clean; internal loading is not always visible.
- Check and clean heat exchangers. Fins clogged with dust reduce cooling and push discharge temperatures upward.
- Inspect air and water lines. Look for corrosion, chafing, or weeping joints.
- Verify control setpoints. Confirm load and unload pressures match process needs; adjust only within manufacturer limits.
- Back up controller settings. Store a copy of parameters so a controller fault does not erase your configuration.
- Lubricate only where the manual specifies. Oil-free designs still contain bearings and drives that need approved greases at defined points.
Log each filter part number and batch so warranty or quality questions can be traced later.
How to Replace Intake and Final Filters Step by Step
Filter changes are the most common hands-on task on an oil-free compressor. A consistent procedure prevents the small errors that turn a ten-minute job into an air quality incident.
- Prepare. Confirm the replacement part number against the machine manual, stage the correct filter, and put on clean gloves. Dirt on a new element defeats its purpose.
- Shut down safely. Stop the compressor, isolate power, lock out, and release residual pressure in the filter housing.
- Remove the old element. Unscrew the housing or unlatch the cover, note the direction of airflow printed on the old element, and lift it out without shaking dust into the clean side.
- Inspect the housing. Wipe the interior with a lint-free cloth. Check the sealing surface for cracks or embedded debris.
- Fit the new element. Seat it squarely against the seal and tighten the cover to the specified torque. An uneven seat allows unfiltered bypass air.
- Restore and test. Close the housing, remove lockout, restart, and watch for leaks or abnormal whistling at the seal.
- Log the change. Record date, running hours, part number, and technician initials in the maintenance log.
Final filters on the downstream side follow the same logic, with one addition: verify that the housing drain trap works after reassembly, because a blocked trap lets collected condensate return to the air stream.
Quarterly and Annual Service Tasks
Longer-interval work protects the core compression elements and the drive train.
- Quarterly: tighten electrical terminals per torque table, inspect contactors, sample and review controller event history, and calibrate pressure and temperature sensors.
- Every twelve months: replace final air filters and separator elements, overhaul drain valves, check bearing condition on the airend, and verify motor insulation resistance.
- Once a year: pressure-test the receiver and safety valves per local regulation.
- Also yearly: review vibration readings against the machine baseline; rising amplitude at bearing frequencies signals wear.
Schedule annual service with a qualified technician who has access to genuine parts and factory procedures. For machines covered by a manufacturer service plan, keep the confirmation records with the maintenance log.
Verifying Compressed Air Quality
Maintenance only counts if the delivered air still meets process requirements. Many industries reference ISO 8573-1, the international standard that classifies compressed air by particles, water, and oil content. Oil-free compressors aim for the strictest oil class, but filters, dryers, and piping condition all influence the final result.
Plan periodic air quality testing with a qualified laboratory or an accredited on-site instrument. Sample at the point of use, not only at the compressor outlet, because distribution piping can add contamination. Compare each report with the class your process requires, and keep reports as objective evidence during customer audits.
If a test fails, review recent maintenance entries first. A missed filter change or an overloaded dryer explains most quality excursions without a deeper fault.
Maintenance Log Template
A simple table keeps records consistent across shifts. Copy the columns below into a spreadsheet or print one page per machine per month.
| Date | Running hours | Discharge pressure | Discharge temperature | Actions performed | Parts used | Technician |
|---|---|---|---|---|---|---|
Review the log monthly. Trends in temperature or pressure tell you more than any single reading, and a complete history raises the resale value of the equipment.
Common Maintenance Mistakes to Avoid
Even experienced teams fall into predictable traps:
- Stretching filter intervals to save cost. A loaded filter raises energy consumption and can let particles reach the airend.
- Ignoring small leaks. A single persistent leak wastes compressed air every hour the system runs.
- Skipping record keeping. Without logs, warranty claims and audit questions become hard to answer.
- Using incorrect parts or lubricants. Non-approved materials can contaminate air and void coverage.
- Deferring annual service. Bearing and seal wear progresses silently; annual inspection catches it early.
- Mixing procedures between machines. Two compressors with different duties need different intervals; copying one checklist without adjustment leaves gaps on both.
- Treating alarms as suggestions. Every alarm exists because a measurable limit was crossed, and each one deserves a written entry in the log with the action taken.
Most of these mistakes share one root cause: maintenance treated as a cost to minimize rather than as insurance on air quality and uptime. The cheapest filter change is the one done on schedule, not the one stretched until something downstream fails.
Planning Spare Parts and Professional Service
Reliable maintenance depends on parts arriving before they are needed. Maintain a minimum stock of intake filters, final filters, drain valves, and drive belts for your model. Base quantities on the annual running hours and the manufacturer’s service schedule, then review stock after every planned overhaul.
For multi-machine plants, synchronize service windows so a technician visits once and services several units. Grouping work reduces travel cost and keeps downtime within a single planned window.
If you operate Seize Air equipment, the oil-free screw air compressor product page describes the available configurations, and the technology section explains the design principles behind oil-free compression. Use those resources to align your checklist with the machine you actually run.
Troubleshooting: Symptoms, Likely Causes, and First Checks
When a reading drifts or the machine alarms, a structured first response saves hours. Use the table below as a starting point, then consult the manual or a service engineer for confirmation before replacing parts.
| Symptom | Likely causes | First checks |
|---|---|---|
| Rising discharge temperature | Dirty cooler, blocked intake, high room temperature | Clean heat exchanger fins; verify intake filter condition; measure room temperature at the cabinet inlet |
| Pressure below setpoint | Air leak, loaded filters, excessive demand | Leak survey during a quiet shift; check filter service hours; review recent demand changes |
| Unusual noise or vibration | Loose component, drive wear, airend bearing wear | Inspect mounts and guards; compare vibration with the baseline recorded at commissioning |
| Frequent drain valve cycling | High ambient humidity, failed dryer, leaking drain | Verify dryer operation; observe drain traps for stuck-open behavior |
| Controller warning messages | Sensor drift, maintenance counter reached | Read the full event history; cross-check the indicated sensor against an independent gauge |
| Oil quality test failure at point of use | Saturated final filter, contaminated piping, wrong class specified | Confirm filter age; sample upstream and downstream of the filter; review the required ISO 8573-1 class |
Two habits make this table far more powerful. Record a machine baseline of temperatures, pressures, and vibration when the unit is new or freshly serviced, and write down every alarm with its date and running hours. Patterns emerge quickly once the data exists.
Energy Efficiency and Maintenance
Maintenance and energy cost are directly linked. A loaded intake filter, a fouled cooler, or a slow-reacting drain all force the machine to compress more air or work against higher resistance for the same delivered output. Plants routinely recover the full cost of a disciplined maintenance program through lower electricity use alone.
- Fix leaks first. A single unnoticed leak can waste a meaningful share of output around the clock, because the compressor regenerates the lost air continuously.
- Keep filters on schedule. The pressure drop across a loaded filter converts directly into extra kilowatt-hours.
- Match pressure to the process. Every unnecessary bar of setpoint adds compression work; review setpoints during each quarterly check.
- Recover heat where practical. Compressor waste heat can preheat water or workspace air; the controller trend history shows how much is available.
Track specific energy, meaning kilowatt-hours per unit of delivered air, alongside your maintenance log. A rising trend line is one of the earliest warnings that upkeep is slipping.
Seasonal and Site Environmental Factors
Ambient conditions shift with the seasons, and the checklist should flex with them. In hot months, cooling tasks deserve extra attention: clean coolers more often, verify ventilation in the compressor room, and watch discharge temperature trends daily. In cold months, check that drain lines cannot freeze and that lubricants specified for low temperatures remain within their rated range.
Dusty environments shorten every filter interval. Workshops with grinding, woodworking, or powdered raw materials may need weekly intake filter inspection and monthly replacement. Coastal or wash-down sites add corrosion risk, so include cabinet seals, electrical enclosures, and receiver coatings in the quarterly visual inspection.
Finally, plan for standby periods. A machine idle for weeks needs a defined storage routine: isolate power, drain the receiver, protect the intake, and run the unit briefly on a scheduled cycle so bearings and seals do not sit stationary for months.
Safety Basics Before Any Maintenance Task
Compressed air stores energy silently, and oil-free machines still reach surface temperatures that burn skin. Every task on the checklist starts with the same safety sequence, regardless of how quick the job appears.
- Isolate energy sources. Disconnect electrical supply and apply personal locks according to the site lockout procedure. Tag the isolator so another shift cannot re-energize the machine.
- Release stored pressure. Open the receiver drain and any vent valves, then verify zero pressure on a gauge you trust before opening housings.
- Allow cooling time. Wait for discharge piping and heat exchangers to reach a safe temperature; compressor cabinets can stay hot well after shutdown.
- Use correct tooling. Rated torque wrenches, insulated tools near electrical parts, and eye protection when compressed lines are opened.
- Confirm before restart. Count tools, refit every guard, remove locks in reverse order, and warn nearby staff before energizing.
Never defeat an interlock or a safety valve to keep production running. A machine that trips its protections is asking for service, not for a workaround.
Building a Maintenance Calendar Around Production
A checklist lives on paper; a calendar makes it happen. Start by listing every task with its required interval, estimated duration, needed parts, and the skill level of the person allowed to perform it. Then map those tasks onto your production schedule so maintenance windows open when they hurt least.
Most plants find a three-layer calendar works well. A continuous layer covers daily walk-around items tied to shift changes. A planned-stop layer, usually weekly or biweekly, opens windows long enough for cleaning and inspection. The third layer is the scheduled outage, reserved for monthly filter changes, quarterly calibration, and annual professional service. Booking these windows a quarter in advance keeps spare parts on the shelf and technicians on call before the date arrives.
Build slack into the plan. Tasks slip when production runs hot, so define a hard rule for what may be deferred and what may not. Safety valve tests, for example, should never slip past their regulatory date, while a cosmetic cleaning task can move a week without risk. Write the deferral rules into the calendar itself so supervisors make the same call every time.
Finally, review the calendar after every completed cycle. If a task is always finished early, its interval may be wastefully short; if it is always late, the window may be unrealistic or the staffing insufficient. A calendar that never changes is a sign that nobody is reading it.
Training Operators and Documenting Shift Handover
The best checklist fails if the person holding it is unsure what “check the drain” means in practice. Operator training should cover the machine layout, the meaning of each controller message, the lockout procedure, and the exact pass or fail criteria for every daily item. Hands-on practice with a supervisor present beats a written briefing every time.
Shift handover deserves the same rigor. A short written note should carry three things forward: any alarm or abnormal reading observed during the shift, any task deferred and why, and any part consumed from stock so reordering can start immediately. Ten minutes of disciplined handover prevents the classic failure where three consecutive shifts each assume the previous one handled a warning light.
Keep training records beside the maintenance log. Auditors in regulated industries routinely ask who is authorized to perform each task, and a signature list answers the question in seconds. Refresh training whenever the machine firmware, the checklist itself, or the operating personnel change.
Documentation, Warranty, and Compliance
Maintenance records serve three masters: the manufacturer, the customer, and the regulator. The manufacturer expects complete logs as a precondition of warranty coverage; a failed component with no service history invites disputes that a tidy log settles immediately. Customers rely on documented upkeep of the compressed air system to support their own quality claims about the products you help them make. Regulators, for their part, often treat pressure vessel test certificates and safety valve records as legal requirements with fixed deadlines.
Store records so they survive personnel changes. A shared drive folder per machine, named by serial number, beats a binder in the maintenance office. Include scanned service reports, air quality laboratory results, parts invoices, and photographs of nameplates before they fade. Back the folder up off-site, because the day you need these documents is often the day the server room is unreachable.
When the machine changes hands, the documentation transfers with it. A full service history measurably raises resale value, because the buyer can see exactly how the airend was treated rather than taking the seller’s word for it.
In-House Maintenance Versus a Service Contract
Plants weighing in-house upkeep against a manufacturer service contract should compare total cost and total risk, not just the hourly rate. In-house teams offer instant response and deep familiarity with the specific installation, which suits continuous processes where every minute of downtime is expensive. The trade-off is tooling, training, and spare parts inventory, all of which cost money even when the machine runs flawlessly for months.
Service contracts transfer the scheduling burden to the provider and guarantee access to factory-trained technicians and genuine parts. For single-machine sites without a dedicated maintenance department, a contract often costs less than building equivalent capability internally. Hybrid arrangements work well too: operators handle the daily and weekly routine, while the provider covers quarterly calibration and the annual overhaul.
Whatever the model, the checklist and the log remain the plant’s property and responsibility. A service contract does not replace record keeping; it makes those records even more important, because they define exactly what the provider was asked to deliver.
Frequently Asked Questions
How often should an oil-free air compressor be serviced?
Base service frequency on running hours and the manufacturer’s schedule rather than the calendar alone. Daily and weekly checks run continuously, filter changes follow operating-hour counters, and most continuous-duty installations need a full professional inspection once a year.
What happens if maintenance is skipped?
Skipped maintenance shortens filter and bearing life, raises discharge temperature, and increases energy consumption. In regulated industries, missing records can also fail customer audits even when the machine still runs.
Can operators do all maintenance themselves?
Operators can handle daily, weekly, and some monthly tasks after proper training. Annual work involving internal components, pressure vessels, or electrical testing should be done by qualified service personnel.
How do I know the air is still oil-free?
Verify through periodic air quality testing against ISO 8573-1 classes, reviewed together with your maintenance records. Oil-free compression at the source plus correct filtration and dry, clean piping keeps the delivered air within the required class.
Is an oil-free compressor really maintenance-free?
No. “Oil-free” describes the compression process, not the absence of upkeep. Filters, coolers, drains, drives, and sensors all require the same disciplined attention as any industrial machine, and the airend bearings still need correct lubrication from approved sources.
What records should be kept for a customer audit?
Keep the maintenance log, filter and parts invoices, air quality test reports, annual service reports, and training records for the operators. Together they demonstrate that the compressed air system is controlled and monitored.
More Questions About Oil-Free Compressor Upkeep
How do I align the checklist with the machine manual?
Use this article as a framework, then replace the generic intervals with the exact service table from your manual, including torque values, lubricant specifications, and part numbers. Where the two conflict, the manual takes precedence.
Does maintenance differ between scroll and screw oil-free designs?
Scroll units have fewer wearing parts and often run without a receiver in small installations, while screw units handle higher flows and include more filtration and cooling stages. The daily observation routine stays similar; parts lists and service intervals diverge, so follow the manual for your specific design.
Conclusion
A disciplined oil-free air compressor maintenance checklist protects air purity, controls energy cost, and keeps production stable. Start with daily observation, layer in weekly cleaning and monthly parts work, and never defer annual professional service. Keep the log complete, adjust intervals to your duty cycle, and confirm every procedure against the manual for your specific unit. When you are ready to align the checklist with a particular machine or to book professional service, contact the manufacturer through the contact page with your model and running hours at hand.

发表回复